How to Install Venetian Blinds

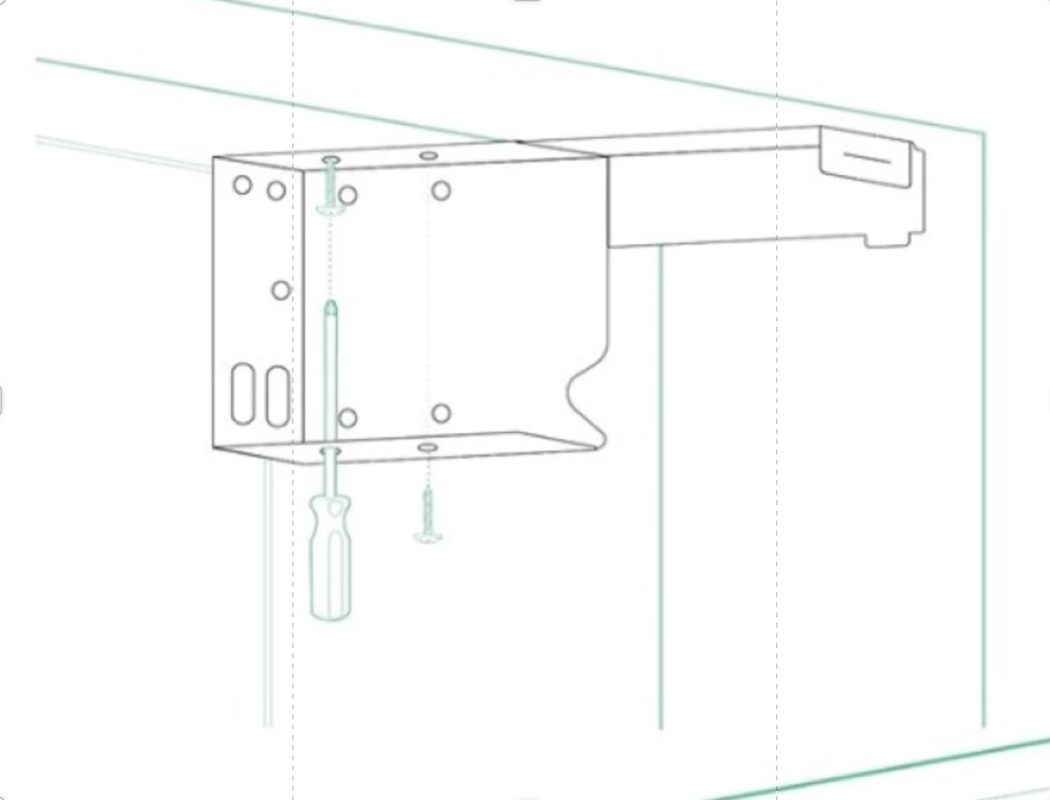
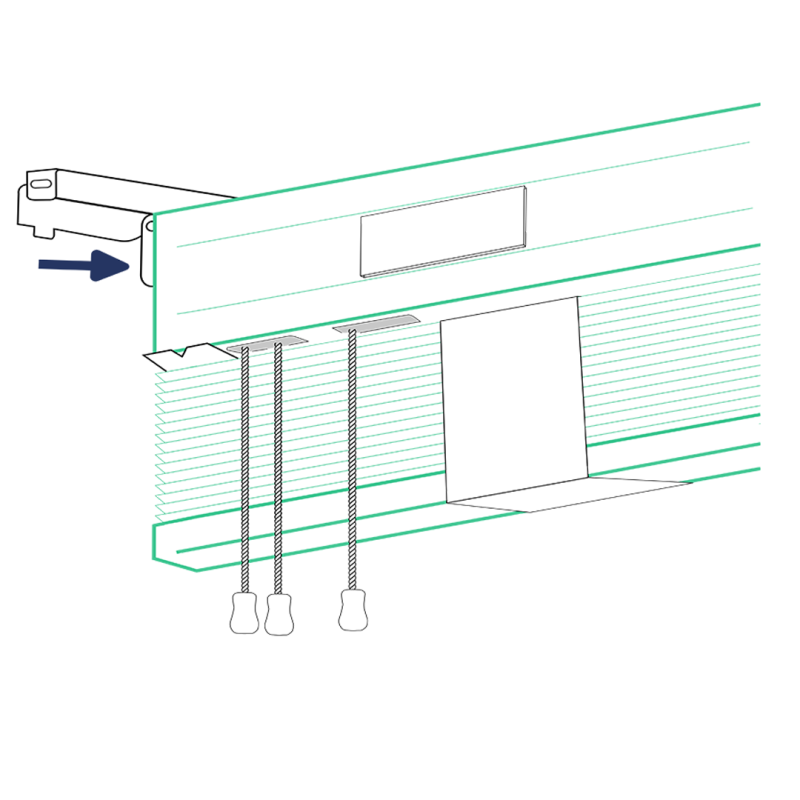
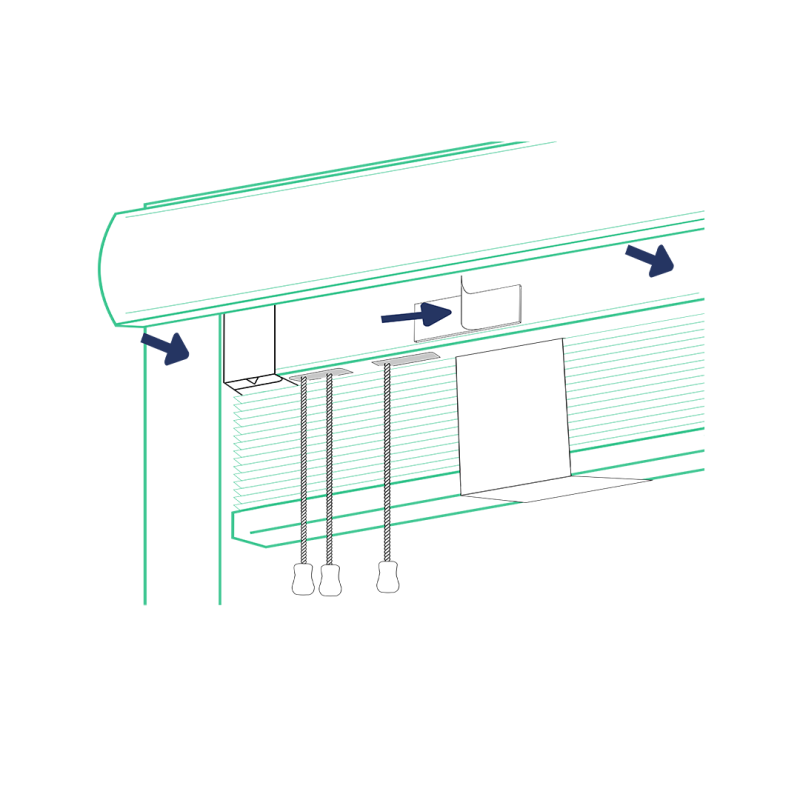
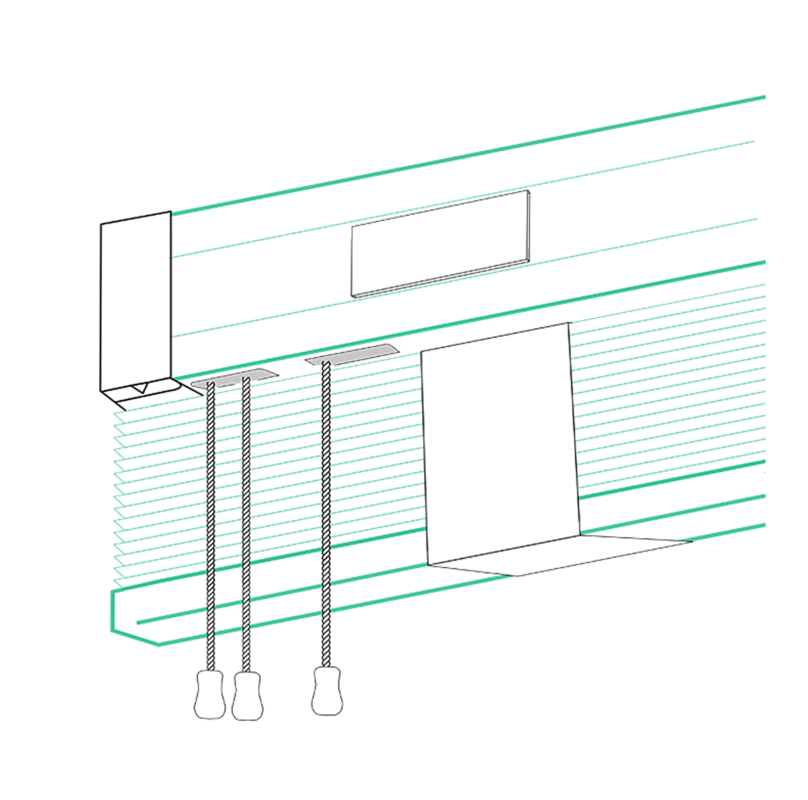
Installing our Venetians Blinds is easy peasy. You just screw the brackets into your window frame (or above it if you’ve selected an “outside” fit), slot the blinds in, “click” the brackets shut, and then stick on the pelmet (if provided). That’s it!

1. Screw in brackets

Inside Fit: Position LH bracket in top LH corner and secure in place using 2x screws provided. Repeat steps for RH bracket. Ensure brackets are level.

Outside Fit: Attach LH bracket using measurements you initially took.
If installing near the frame edge, pre-drill to prevent splitting. For wall mounting, use spacers/packers and longer screws to allow proper clearance.
Follow same steps for RH bracket.

Install centre bracket if provided.

2. Insert Headrail

Detach control cord bundle from top of headrail. Open latches on end brackets.
Place headrail into brackets, ensuring control cords are on correct side. Insert headrail into brackets, ensure control cords are on correct side. Push latches on both sides closed. Make sure both “click” into place.

3. Attach Pelmet

Remove protective tape from velcro tabs attached to headrail. Align the pelmet with top of blind and press it firmly onto the velcro tabs. Carefully untie the fabric straps while holding the blind in place.

Note: Aluminium Venetians do not have pelmets.

4. Operating the blind

To lower: Hold the cords in front of blind and gently pull to release.

To adjust tile: Use tassels to tilt the slats as desired.